I have found a frame and done some major altering.
Let's have a look!!!
 I have tons of pictures for you so that you can see the details a bit better!!
I love country decor and this is just that!!
 I have used all papers from my scrap bag so I couldn't even begin to tell all of them that I have used.
 But I do call this kind of project a country clutter look.
I have covered all of the little wooden blocks with different papers and then used my distressed inks on the edges and of course to give it that old worn out look I have used my file and sanded and blocks. Now if you will look close you will see that each side of the blocks is covered with different papers also. I have used my Glimmer mist over the whole project when finished to give it just a tad bit of a sparkle.

Here is a little side view so that you can see the blocks all do pop out 1/2 of a inch from the backing of the frame.
 Here you can see that I have used
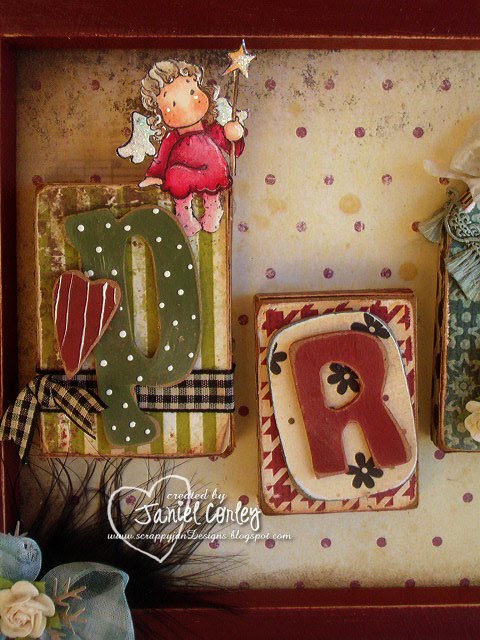
Mini #3065 Angel Tilda and have her sitting up on top of the "P" block.
I have used a wooden heart some ribbon and painted the "P" with acrylic paints and I have sanded all letters after I have painted them.
The letter "R" has 2 layers. First the wooden block and then a wooden roundish disk then the letter "R" on top of that.

Now we have the letter "A" and I this little block cut into a tag shape and have added a sheer ribbon bow with Prima rose at the top and also a flower at the bottom. If you look close you will see that I have added some interesting trim to the block.
The letter "I" has the cutest little #3072 Starlight Tilda (out of stock right now but should be getting her back in soon)
I have used a wooden star and added thread for the dot of the "I" on this block.

The letter "S" has 2 different trims wrapped around it and then I have layered it with a wooden tag and added raffia and a Prima rose to the top. Then I have added my all time favorite #377 Traveling Tilda
I just love her little knees popping out and that hat is the cutest!!!
She is also out of shock right now but sure that she will be in very soon. I have added a link to the regular sized stamps if you should need them. tee hee heeeeee
The letter "E" I have used some trim and at the top I painted a little wooden knob and sanded it. I also have added some raffia and a Prima rose.
If you look in the main picture you will see that I did add a feather with sheer bow and rose to the left hand bottom corner to finish of the project.
Well just what did you think of my project?
I would love to hear you thoughts!!
I do hope that you will be able to find the time to join us with this very fun project this month at the Magnolia-Licious HighLites Challenge Blog!!
Make sure that you stop by to see the beautiful creations that the other DT members have made!!
Wishing you all a fabulous day!!!!!!!